


Uploading Covered California verification documents when no manage verification link is present.
After you have enrolled in a health plan through Covered California you may receive a letter requesting to send in or upload documents verifying income, citizenship, or other pieces of information needed to confirm eligibility. Usually on the consumer’s home page there will be a link that says Manage Verifications or Provide Verifications. Sometimes those links are missing, but there is still a secret way to upload documents to your Covered California account.
Secret Page For Uploading Verification Documents
Either the Provide Verifications or Manage Verifications links will take you to a page to that lists all the household members for whom Covered California is requesting documents for. You can upload specific documents for each household member and submit the verification. But if neither of those links is present, you can still upload documents that Covered California has requested.

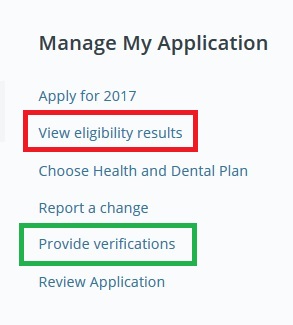
Select View Eligibility Results to get to the Documents and Correspondence page for uploading documents.
From your Covered California home page, scroll down until you see the three columns of different blue links. Under Manage My Application if the Provide Verification link is not present, click on View Eligibility Results. On that page, on the left hand column will be a series of titles with drop down menus. Select the Summary title and then click on Documents & Correspondence.

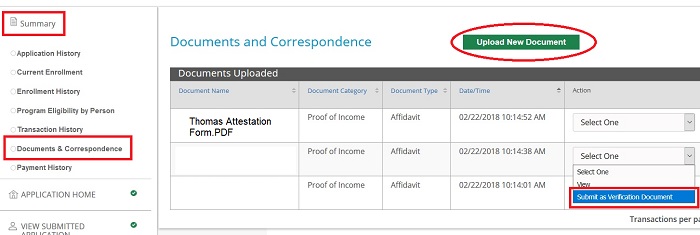
After you have uploaded a verification document, you need to submit it as a verification document from the Action column, Submit as Verification Document.
At the top of the Documents & Correspondence page there will be a green button titled Upload New Document. From there you can select a file from your computer’s hard drive to upload. Either jpg images or pdf documents will work but the system can be picky about the extension. If a .PDF of .JPEG document doesn’t work, change the extension to lower case.

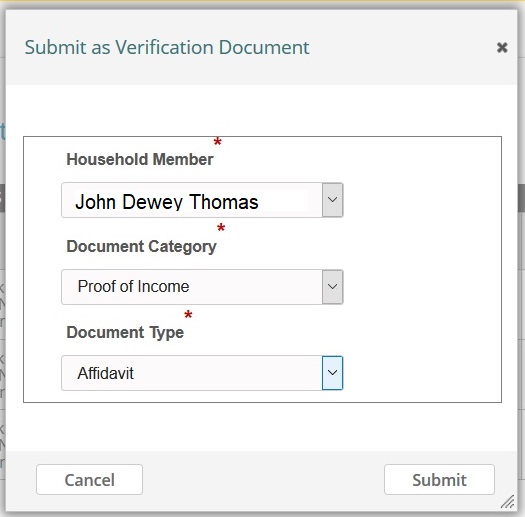
For the document upload, select to specific household member it is for, the category, and document type from the drop down menus.
Once the document has been uploaded it will show up in the Documents & Correspondence table. You then want to go to the Action column, click on the drop down menu Select One, and select Submit as Verification Document. This will bring up a popup window (make sure you’re the popup blocker of your web browser is disabled) where you can select the household member, the document category, and the type of document being uploaded. Then click Submit.
This will highlight the specific document so Covered California knows to review it. I have been told that this process, in addition to just uploading the document, will hasten the review of the document at Covered California as they are alerted to its important nature.