
How to make great photos for family, friends and social media using your iPhone and Instagram.
The best part of my iPhone is the camera. The second best part is posting the images to social media such as Facebook and Instagram. While I don’t consider myself a photographer, plenty of people have commented how great my photos look. Recently a friend wanted to buy a camera like the one I used to take great photos similar to the ones I post. I told him he already had his own great camera in his pocket on his mobile phone.
Making a great photo with your iPhone
When it comes to taking great photos with you mobile or iPhone, I’ve learned a few lessons of the years. I follow a few simple procedures when I’m taking photos. The fun part comes when I edit the photos to make the images stand out.
- Get Close. Get as close to your subject as possible. Try to make the subject comprise at least 25% of the image area. Don’t use the zoom feature on iPhone to make the image bigger. That won’t help when you go to edit the picture. You need to get as physically close to the subject as possible. Camera phones take photos at relatively low resolution or about 96 dots per inch. If you try and enlarge a tiny spot of an image in your photo, you just get a blob of square pixels.
Get Close! Try to make the subject of your photo at least 25% of the image. It helps the picture quality when you go to crop the subject of your picture. - Take the Shot. If you see something interesting, just take a photo. You can always delete duplicates or stupid photos. Whenever I tell myself, “I’ll take the picture on the return trip.”, either I forget, I don’t see the subject, or the light has changed. Even if the picture doesn’t look good when you first take it, you can fix a lot of issue when you edit it later.
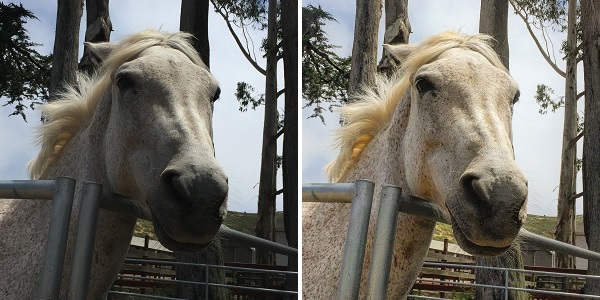
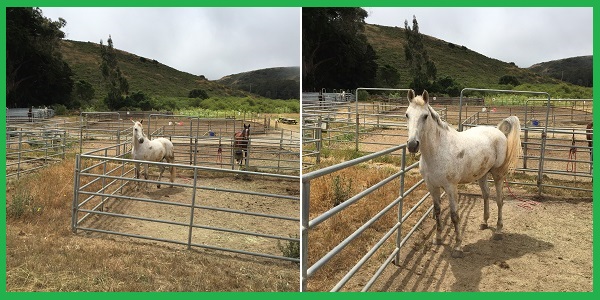
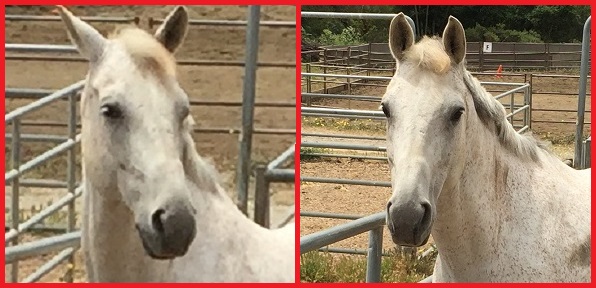
Using Instagram editing options, I was able to lighten the shadows on Freckles the horse and sharpen the image. I did not use a flash. - Take lots of Photos. Don’t take just one photo, take lots of photos of the same subject. I’ll usually take at least three to five pictures of the same subject. Because I take most of my pictures on hikes while I’m not wearing my eyeglasses, and everything is mostly blurry on the little iPhone, I snap multiple images from different angles hoping one looks good and is in focus.
If you try to enlarge a subject that is too small in the original photo, it just turns out blurry. Get close so when you crop the photo, the subject is still crisp and sharp. - Tap the Glass. Tap the image on the iPhone viewer to set the auto focus and light balance. If you have an image with sharp shadows, take a picture where you tap the shadow area, this will overexpose the image, but it may still work when you edit the photo. The more pictures you take the greater the selection you have to create a great photo.
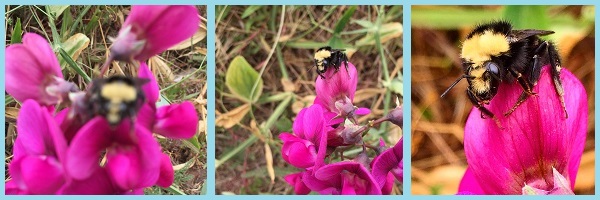
Most close up shots are blurry. Insect photos don’t always meet my 25% image size rule of thumb. But if the image is in focus, you can crop the insect to a decent size. The antennae and fur of the bumble were enhanced using the Structure and Sharpen features of Instagram. - Don’t Flash It. These mobile phones are so good at compensating for low light conditions. There is almost no reason to use the flash. More often than not, using the flash just destroys a good picture by making harsh shadows or weird lighting. The flash feature is best used on people outside to fill in areas of dark shadows.

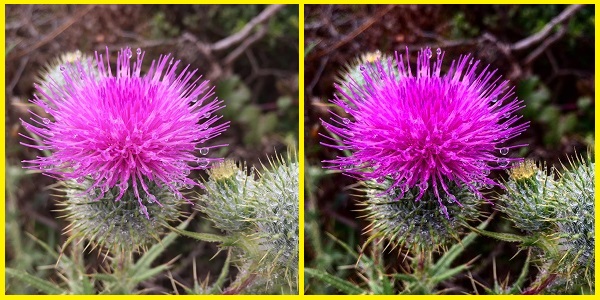
While overcast marine layers usually make photos better by reducing harsh shadows, they can leave the photo looking washed out. I sharpened the image and increased the saturation to make the red tile roofs of Fort Cronkhite in the Marin Headlands pop out along with some green wetlands and lichen on the rocks. - Crop and Edit. Virtually every photo can be improved by cropping and editing it. Some photos just suck until you apply some enhancements to make the subject pop out of the picture. There are lots of apps for editing photos but I usually use Instagram because the controls are easy to understand and adjust. The best way to learn how the adjustments work is by playing with them. I rarely use the filters provided by Instagram or other applications. I prefer to make my own minor adjustments until I am satisfied with the image. What I’ve learned is that the image you capture on your iPhone holds a lot more information than what you can actually see. Consequently, you can create an almost entirely different looking picture from the one you took.
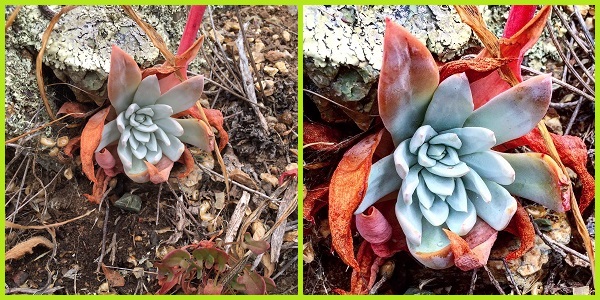
The picture of this succulent on the Miwok Trail in the Marin Headlands was good to begin with. I cropped it, enhanced the colors, and adjusted the structure to provide more definition to the image. -
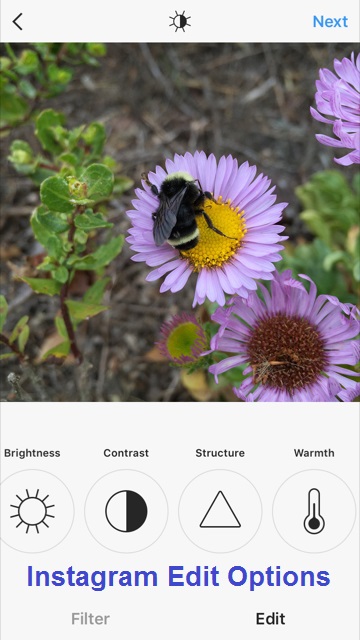
The Instagram mobile photo app is easier to use than the iPhone photo editor.
Brightness: adjusts the brightness or exposure, helpful for revealing items caught in the shadows
- Contrast: increases the difference between dark and light, really helpful for separating objects in picture. Sometimes the adjustments can be counter intuitive such as decreasing the Brightness and increasing the Contrast. But you have to play with them to see what works to highlight the subject best.
- Structure/Sharpen: Both of these features will make the photo less soft by providing sharper edges. It can also alter the colors of the photo. Sometimes just adding a little of either to a photo, like seasoning on food, can go a long way to making a better photograph.
- Warmth: sometimes called Cast, it regulates how much influence the reflection of a blue sky has on the image.
- Saturation: increasing the saturation enhances the color intensity of the photo. A little bit of saturation will increase the blue of the water, the green of the grass or the purple of the flower.
- Highlights: adjusts the areas of the image that are relative lighter than other areas.
- Shadows: adjusts the areas of the image that are relatively darker than other areas of the photo.
- Vignette/Tilt Shift:Vignette will darken the outside edges of the photo while Tilt Shift will apply blur to certain parts of the image. These can be helpful to highlight a complex image surrounded by distracting landscape.
-

A jack rabbit, not too fearful of the many visitors to Bodie State Park, poses for a picture. I blurred the surrounding landscape to make the rabbit appear more in focus.
Your picture, Your art
Some people scoff at manipulating the image with the above adjustments. They contend that a good photo will stand on its own, and for the most part I agree. But not everyone sees colors and images the same way I do. Plus, photography is a small art form where the creator can shape the image to reflect a mood or make a statement.
Practice using the iPhone for up close pictures
The iPhone isn’t great for subjects that require a telephoto lens such as birds in flight. It can also be tricky to photograph subjects up close like insects. The iPhone wants to focus on the area that is the largest percentage of the image, which is usually the ground. This leaves the insect, like a butterfly or bee, all blurry. Hence, that is why you have to take multiple shots, getting as close as you can while tapping on the insect to try and get the camera phone to focus on that little bug.
Take lots of photos, they cost nothing to delete
The most important aspect of iPhone photography is practice, practice, practice. I typically take over 150 photos on a eight mile hike, and usually only get eight to ten images that are decent. The cost of taking all those extra photos that will be deleted is $0. But getting a handful of images that are really sharp and capture the landscape and environment is truly priceless. So before you invest hundreds of dollars for a fancy single lens reflex camera from Cannon or Nikon, practice making great photos with your mobile phone. I think you’ll be surprised by the results.
You can see the photos I post to Instagram at https://www.instagram.com/insuremekevin/
